

Saturday, May 31, 2014

Product Review: 2.5mm Pearl Rhinestones
Hey guys, today I’m reviewing some rhinestones for Born Pretty Store! You can find these studs and more in the Nail Art Section of their website!
The rhinestones that I’m reviewing can be found here and look like little multi-coloured pearls! I knew right away what I wanted to do with these studs: mermaid nails!

The rhinestones are 2.5 mm in diameter and come in a one-wheel set that should contain 360 pieces (I can’t say the exact number I received since I didn’t count them, but there were a fair amount of beads in the package!)


For this design I decided to do a three-tone ombré on 4/5 nails and then a sand-covered accent nail. For the ombré nails I started out with a white base, sponged on the colours, and then topped it off with a thin coat of glitter polish. For the accent nail, I started off with a beige base and then, with the nail polish still wet, dipped my nail in some sand.

After I had the base done, I added some detail in white polish and then it was time to start adding embellishments! To apply the rhinestones I used tweezers to pick them up and dip the flat side in nail art glue before positioning them on the nail.
Some pros and cons that I found with these studs:
Pros: They sit well on the nail and look lovely on, as well as having a nice variety of colours to choose from
Con: They are an absolute pain to pick up. Since the tops of them are rounded, it’s very difficult to get a grip on them with tweezers or even with your fingers.Be prepared with some patience when applying these!
Pros: They sit well on the nail and look lovely on, as well as having a nice variety of colours to choose from
Con: They are an absolute pain to pick up. Since the tops of them are rounded, it’s very difficult to get a grip on them with tweezers or even with your fingers.Be prepared with some patience when applying these!

With that being said, I do like this product even though applying them can be a little trying. The rhinestones are versatile and could be used in a number of designs. These rhinestones sell for C$4.34 (US$3.99) for one wheel with free worldwide shipping.
Don’t forget, you can use the coupon code FHX31 for 10% off at Born Pretty Store!
Don’t forget, you can use the coupon code FHX31 for 10% off at Born Pretty Store!
I hope you enjoyed reading!
xo,
Becca
Becca
** These products were provided for review. All opinions are my own and have not been influenced by anyone. **
Thursday, May 29, 2014
Overdose
Wow I am so late with this post but I have a valid excuse this time around: I was out of the country.
Moving on, Exo recently came back with their newest mini-album Overdose and you all know that means I have to do a manicure in honour of it, so here you go!

Saturday, May 03, 2014
Product Review: Silver Nail Art Glitter
Hey guys, I'm doing another review today for Born Pretty Store! If you haven't checked Born Pretty out before, they have some great products in their Nail Art section, as well as other, non-nail-art products.
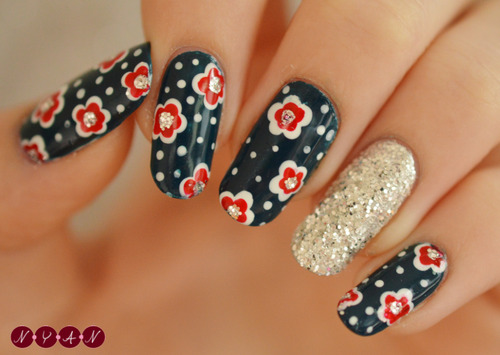
Today I'm reviewing some Silver Nail Art Glitter (#4). I had the most difficult time deciding on a design to do with this glitter since I don't use glitter all that often. I finally settled on a floral design with a glitter accent.
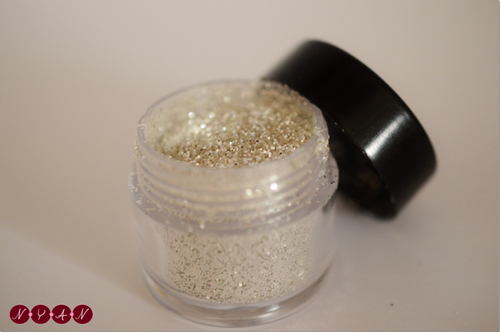
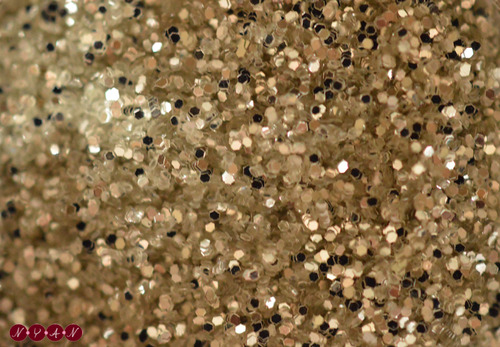
The glitter comes in a 1 piece set and you have an option of 4 different sizes of glitter. I'm using the smallest glitter out of the four.


For the design, I started off with a teal base and then used a dotting tool to make large white flowers and a smaller dotting tool to make the red centers. These are the products I used for the design:

To apply the glitter, I put a layer of top coat on my nail and then dipped it into the little pot. It coated the nail well, and stays in place even without a top coat. I'm sure there's probably an easier way, but I found the glitter application to be kind of messy (not that it was much of a surprise considering it's glitter and that's always a mess). It got all over my fingers and I spent a lot of time trying to get it off (and preferably back into the pot). It did come off relatively easily though, when I gently scraped it off.
One plus of having the pieces of glitter so small though is that it's easy to get a clean line at the base of your nail.
One plus of having the pieces of glitter so small though is that it's easy to get a clean line at the base of your nail.
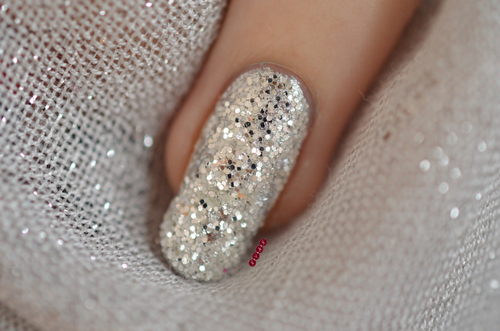
I also used the glitter in the center of the flowers which proved to be a lot harder than having the entire nail covered. Since the glitter is so small it's too hard to pick the pieces up and place them individually, but it's also difficult to take multiple pieces of glitter out of the pot and place them nicely.
For this reason I would probably recommend this glitter for larger areas instead of in small little designs.
For this reason I would probably recommend this glitter for larger areas instead of in small little designs.
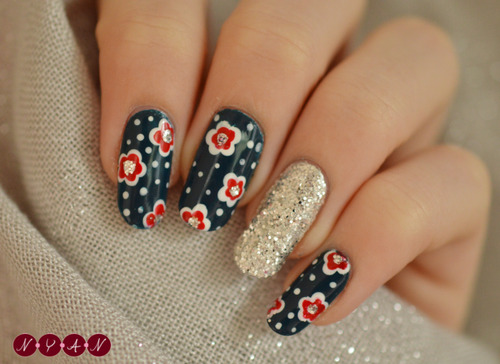
With all that being said, I do love the way the glitter turned out; so sparkly! It's great for a glitter-encrusted accent nail or, if you're feeling up to it, an entire glitter manicure. This glitter sells for $3.89 individually with free worldwide shipping (as is the same for BPS's other products).
Don't forget, you can get 10% off at Born Pretty Store using the coupon code FHX31.
Don't forget, you can get 10% off at Born Pretty Store using the coupon code FHX31.

I hope you enjoyed reading!
xo,
Becca.
Becca.
** These products were provided for review. All opinions are my own and have not been influenced by anyone. **
Tuesday, April 29, 2014
Product Review: Rose Water Decals
Hey guys! I’m doing my first review for Born Pretty Store today and I’m excited to share it with you! If you haven’t looked around Born Pretty before, they have a great selection of tools and decorations in their Nail Art section.
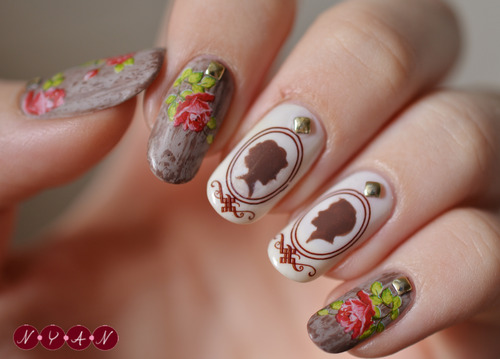
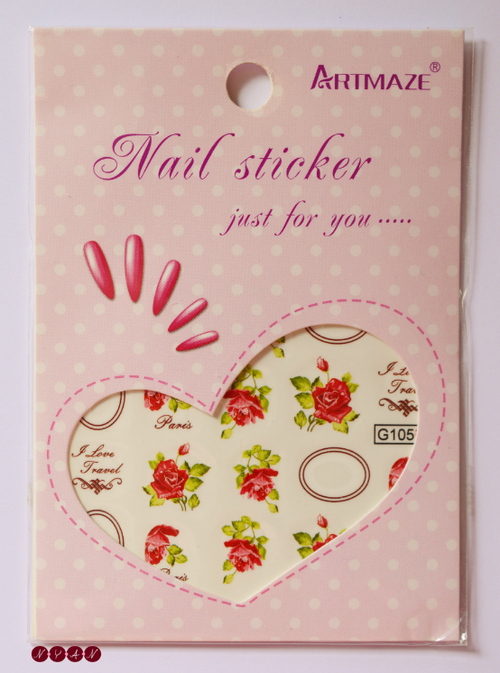
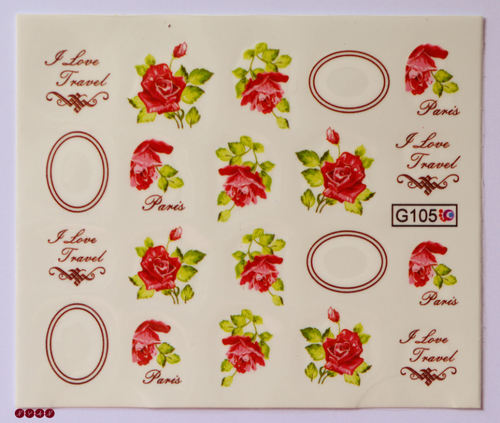
Today I’m reviewing these Floral Water Decals! I haven’t used water decals in a while, but these ones sparked my interest. I chose sheet #G105 for the oval frames (which probably seems a little odd considering how pretty the roses are) because they immediately gave me an idea for a cameo design.
The decals come in a one-sheet package and this particular sheet has 20 individual decals on it.
For three of the nails I started off with a base coat and 2 coats of Essie’s Master Plan and then used Essie’s Mink Muffs and Chelsea Queen’s tutorial to create a wood texture. For the other two nails, I used 3 coats of Essie’s Waltz.

When my nails were completely dry, I cut out the decals I wanted to use. The decals are well spaced-out on the sheet so you don’t have to worry about accidentally cutting into another decal.
With that being said, I did make some modifications to some of the decals. I used only the bottom part of the “I love travel” decals and cut around “Paris” on one of the rose decals; if the words don’t suit your needs it is possible to use only parts of individual decals.
With that being said, I did make some modifications to some of the decals. I used only the bottom part of the “I love travel” decals and cut around “Paris” on one of the rose decals; if the words don’t suit your needs it is possible to use only parts of individual decals.
Applying the decals was very simple. Once I was ready to put a decal on, I submerged it in a small container of room-temperature water for 20 seconds. When you remove the decal from the water, the design easily separates from the back and then you can apply it to the nail. While still wet, the decals don’t immediately adhere to your nail which is wonderful because it gives you a little bit of time to move the decal around and make sure it’s placed right where you want it.
Once you have the decal in place, just take a dry paper towel and dab the nail to sop up any excess water.
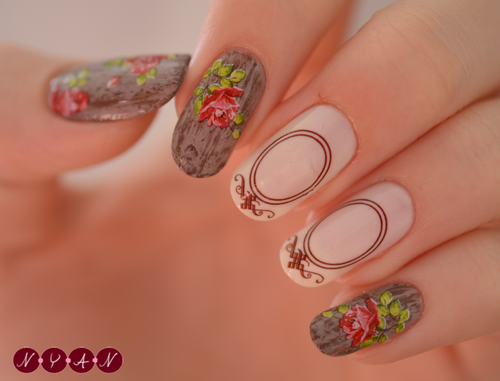
Once I had finished with the decals, I painted in the silhouettes of the cameos, sealed in the designs with a top coat, and added some gold 2mm square studs to finish the design.
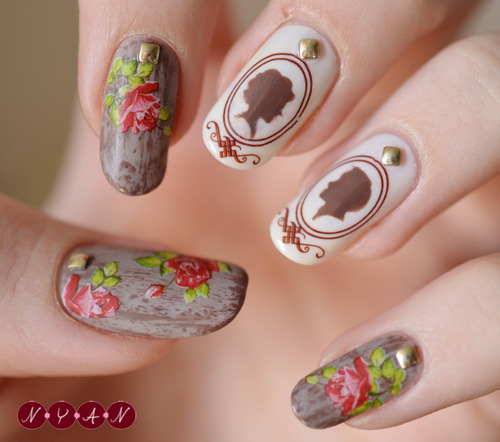
I really liked the decals and love how they look with the design. Like other water decals, you don’t have to worry about this type of sticker peeling off at the edges because they’re so thin and seem to blend right in to the polish. This set of decals sells for US$2.86 per sheet and comes in two other floral designs.
You can get 10% off at Born Pretty Store using the coupon code FHX31 and there’s free worldwide shipping on all products.
You can get 10% off at Born Pretty Store using the coupon code FHX31 and there’s free worldwide shipping on all products.

I hope you guys all enjoyed my first review!
xo
Becca.
Becca.
** These products were provided for review. All opinions are my own and have not been influenced by anyone. **
Sunday, April 27, 2014
Pastel Pop-Art Peeps


Interesting story behind these (kind of, not really).
I had no idea what I wanted to do in terms of Easter nails (I always seem to run out of inspiration when it comes to holidays or big events...) and spent a good amount of time browsing Google images for inspiration. I was close to doing traditional Lithuanian/Polish Easter eggs, but I also kind of wanted to do Peeps. My roommate and I finally decided that I should do Peeps and as I continued to browse Google, I came across the following image:

I joked that I should do Pop Art Peeps after my last Pop Art design and it ended up being decided that I would indeed be painting Pop Art Peeps on my nails.
I hope everyone had as interesting an Easter as I did!
Products Used:
Borghese - B476 Incantato Purple
China Glaze - 654 Designer Satin
Ciaté - 074 BIg Yellow Taxi
Coco & Lulu - 432 Macron
Essie - 624 Mink Muffs
Essie - Grow Stronger Base Coat
Revlon - 280 Orbit
Sally Hansen - 130 Blue Me Away!
Sally Hansen - 300 White On
Sally Hansen - 360 Barracuda
Sally Hansen - 370 Black Out
Seche Vite - Quick Dry Top Coat
- Becca.
Subscribe to:
Posts (Atom)